May 4, 2021
- How do Bypass Shocks Work?
- Shock Zones & Basic Tube Layout
- Bottom Take Off Reservoir
- Off the Shelf Options
- Multiple Compression & Rebound Tubes
- Staggered vs Overlapping Tubes
- Piggyback vs Remote Reservoir
- Shock Diameter
- Tube Layout around body
- Tube Heights & Diameter
- Custom Setup Recommendations
- Fox vs King Comparison
- Check Valve Design
- Pistons
- Bypass Adjusters Screws
- Piston Rods
- Oil Seals
Bypass Shocks PART 5
- Bypass Shock Setup
- Up Travel
- Motion Ratio – Coilover and Bypass
- Total Weight
- Weight Distribution (front/rear)
- Unsprung Weight

Shock Travel
Up Travel
Up travel provides the shock with enough room to absorb bumps without bottoming out. Since bypass shocks are position-sensitive, each damping zone needs sufficient space to operate effectively. Without adequate up travel, the suspension can end up feeling either too stiff or too soft—sometimes both—without achieving the ideal balance.
If there isn’t enough up travel, the shock may enter the bump zone even on moderate bumps. Trying to soften the ride in this situation often leads to frequent bottoming out. Based on our experience, a minimum of 5 inches of up travel at the wheel is required for bypass shocks to perform properly—and generally, more up travel is better.

Down travel allows the axle to droop into bumps and absorb them smoothly, but too much droop can cause sloppy handling and other off-road performance issues.
When selecting springs, a key consideration is preload—ensuring springs never come loose and that they adequately push the axle downward. While there’s more to spring selection, this is a fundamental starting point.
If the vehicle starts with excessive droop (shocks fully extended), the springs must be soft enough to compress back to ride height. The more droop you have, the greater the spring compression required. This lowers effective spring force, which can negatively impact handling, g-out performance, drive shaft torque resistance, and load-carrying capacity. For most vehicles, 9 inches of droop is sufficient.
On the other hand, vehicles with very little droop struggle to keep tires in contact with the terrain, leading to poor ride quality. They may also require overly stiff springs, which can worsen ride comfort. Additionally, setups with both minimal droop and excessive spring preload risk coil bind before bottoming out.
For most vehicles equipped with bypass shocks, we recommend a minimum of 5 inches of droop to balance ride quality and suspension performance.

Motion Ratio On axle
When mounting shocks on the axle, it’s common to angle them to gain more travel. However, laying shocks over at an extreme angle reduces their effectiveness and degrades damping quality. As the shock compresses, the motion ratio often becomes more severe, making the suspension feel less controlled.
While position-sensitive bypass shocks help compensate for this effect, they can’t fully offset it. For optimal performance, we recommend keeping bypass shocks within 15 degrees of vertical.
Gaining extra travel at the cost of travel quality isn’t a worthwhile trade-off. If sacrifices are necessary, it’s usually better to reduce droop slightly—you’ll likely never notice the difference.
Motion Ratio on Trailing arms
In the quest for more suspension travel, it’s tempting to mount shocks very high on the links to achieve big numbers. However, increasing leverage this way can make shocks much harder to tune because they quickly become too soft. This happens not only because the shocks move slower but also because less force is transmitted to the chassis.
For typical prerunners, U4 racers, and similar vehicles weighing between 650–1,000 lbs per corner using 2.5” or 3.0” shocks, aim for a motion ratio of about 0.6 on the coilover and 0.8 or less (numerically higher) on the bypass. Lighter vehicles can run higher motion ratios, while vehicles with larger shocks can use lower (numerically smaller) motion ratios.
Keep in mind this isn’t an exact science; many experienced chassis builders refine these numbers through trial and error. Looking at proven setups on similar vehicles and terrain can also provide valuable guidance. And of course, feel free to ask us for input when ordering shocks.
Coilover & Bypass Orientation on Trailing Arms
In coilover/bypass setups on trailing arms, the coilover is usually mounted closer to the chassis pivot, with the bypass shock closer to the axle.
Coilovers excel at low-speed damping control, which is why they are positioned where they move slower. Bypass shocks, which focus mainly on high-speed damping via the bypass tubes, are mounted nearer the axle where they move more quickly. This orientation ensures each shock type operates within its optimal range, maximizing overall suspension performance.


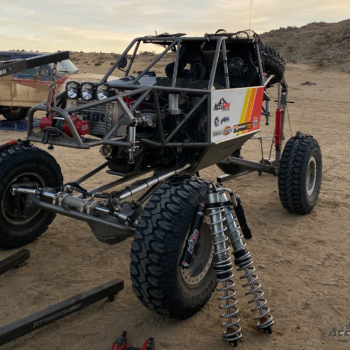
Shock size
We tune shocks so that each one has a distinct purpose and performs a specific role in the suspension system. Choosing shocks that are too small or too large can prevent them from working effectively together.
-
If the shocks are too small, the vehicle will feel overly soft and bouncy.
-
If the shocks are too large, the ride will be harsh and unforgiving.
For on-axle mounting with a chassis weight of 650–1,000 lbs per corner, ideal pairings are:
-
2.0 coilover with 3.0 bypass, or
-
2.5 coilover with 2.5 bypass.
For the trailing arm setups discussed earlier, good choices include:
-
2.5 or 3.0 coilover combined with a 3.0 or 3.5 bypass (larger shock packages suit heavier vehicles).
These recommendations serve as starting points. Your specific use case, budget, vehicle setup, and other factors should also be taken into account when selecting shocks.

Total Weight
Shocks inherently generate forces due to flow restrictions, which are generally beyond our control and cannot be tuned. In most cases, these forces actually help the shock perform as intended.
However, for lightweight vehicles with on-axle mounting and large shocks, these inherent forces can be disproportionately high relative to the vehicle’s needs, leading to less than ideal performance. Conversely, very heavy vehicles may struggle to achieve the desired control with smaller shocks.
If you’re building a lightweight rig and want to run big shocks, consider using trailing arms to better match shock characteristics. For heavier vehicles, plan on using larger shocks mounted closer to the axle to achieve optimal control.
 Weight Distribution

Weight distribution is fundamental to achieving a well-performing vehicle. If one end is significantly heavier than the other, it disrupts the vehicle’s balance and makes tuning the suspension much more difficult.
For most vehicles, aiming for a 50/50 weight balance across the chassis is ideal to maintain optimal handling and suspension performance.

Unsprung Weight
The weight of the axle, tire, and wheel combination plays a crucial role in suspension performance. Moving heavy axles, tires, and wheels while maintaining chassis stability is challenging. If your unsprung weight approaches the chassis weight, it becomes very difficult to dial in the suspension properly.
If you’re looking to reduce overall vehicle weight, start by focusing on the rolling components—tires and wheels—followed by the axles. You might be surprised how much performance improvement comes from shedding weight in these areas.

Suspension Geometry
Suspension geometry greatly affects how the chassis responds to bumps. If your vehicle squats significantly during acceleration, it will also squat every time it hits a bump or whoop. This can overload the rear suspension and contribute to bucking issues.
However, the more suspension travel you have and the softer your setup is, the less critical this issue becomes.

FAQ:
Q: Why do trophy trucks have such poor chassis control?
A: Trophy trucks excel in open desert racing, effortlessly floating over massive whoops, but they tend to be cumbersome and less controlled on the road. Although recent efforts have aimed to improve their handling, it remains a challenging problem.
These trucks are very heavy and position their shocks far up the suspension links to maximize travel. The excessive droop results in very soft spring rates. Despite using the largest shocks available, they struggle to effectively manage the combination of weight and extreme motion ratios.
Out of the five key factors we evaluate, four contribute negatively to their handling:
-
Motion Ratio: Extreme, with shocks mounted very far up the links to gain travel
-
Shock Size: Largest available
-
Total Weight: Very heavy (over 1,300 lbs per corner chassis weight)
-
Weight Distribution: Good
-
Unsprung Weight: Good
-
Suspension Geometry: Good (with plenty of variation, but less critical due to large travel)

- Fox vs King Comparison
- Check Valve Design
- Pistons
- Bypass Adjusters Screws
- Piston Rods
- Oil Seals