June 27, 2024
In this article we are going to go through a complete guide to setting up your new Ride Shocks on a 2021+ Ford Bronco.
Disclaimer: These instructions/measurements are in reference to Ride Shocks only and cannot be used to adjust other manufacturers shocks.
Measuring Ride Height
Please note: Making adjustments to your coilovers should be done by an experienced mechanic. AccuTune Offroad is not responsible for any damages to you or your shocks. When making adjustments, be sure to remove the coilovers from the vehicle and use a spring compressor to remove tension. Once the tension is removed, you can adjust the pre-load ring using the included spanner wrench.
Before: If you have not installed your coilovers yet, now is a good time to measure your stock ride height. You can compare this later on to see what your actual lift height is. Measuring current ride height can be done a few different ways, so choose the method that works best for you. First, you will need to pick the points of where to measure from. Examples of measurement locations would be: surface of the ground to center of differential skid plate or center of your wheel to the fender.

Ride Height
Getting the correct ride height is the first step in setting up your suspension. Pre-load is the initial (pre) tension (load) on your springs before carrying the weight of the vehicle.
For the fronts, each .50” of adjustment you make on the pre-load ring translates to approximately 1.00” of ride height change.
For the rears, each .80” of adjustment you make on the pre-load ring translates to approximately 1.00” of ride height change.
- Install shocks. With the vehicle on level ground, ballpark toe setting if necessary, settle suspension (drive back and forth 10 feet).
- Record height measurement.
- Adjust pre-load with shocks removed from vehicle.
- Repeat step 1 and re-check height when complete.
- Repeat steps above as necessary until ride height is achieved.
Do not adjust preload with shocks installed on vehicle. If you exceed the maximum shock length at ride height, you can damage your shocks.
Max Thread Length Above Pre-load Ring
Refer to the chart to correctly find the maximum.
• Never adjust pre-load with shocks on the vehicle.
• Use provided spanner wrench.
• DO NOT ADD additional pre-load past the max listed for your spring.
• Too much thread showing can cause coil bind, which will damage the spring and shock.

Too Much of a Good Thing. Don’t Over Do It!
Of course the main objective in adding pre-load is to increase the lift of the vehicle, but there can be a point where you added too much, even if you are still in range of the max exposed threads measurement.
The key is to make sure you still have sufficient down travel remaining when at ride height. Too little and you will run into handling issues and potentially damage suspension components.
Springs work in both extension and compression, so too much pre-load makes the shocks too harsh on compression and can lead to a bumpy ride. We look at suspension as a complete package and every piece of it has a purpose, as every component needs to work together in harmony.
Having too much pre-load could actually be a sign that you need to move up to the next available spring rate.
So after everything is accounted for, it is best to find that happy medium between ride height and ride quality.
Dual Piston Adjusters (DPA) – Settings


Low Speed Adjuster
What is Low Speed Compression? Low Speed Compression on a shock refers to the speed at which the shaft compresses into the shock body. A smoother, more gradual shock movement. Low speed compression occurs when a vehicle is cornering, braking/accelerating and driving over large rolling bumps.
When would I need to adjust Low Speed Compression? If you find the vehicle is having too much brake dive, feeling too bouncy or bottoming out on big rolling bumps, you should increase the Low Speed Compression on your DPA. Low speed adjustments on the reservoir are less noticeable than high speed adjustments.
High Speed Adjuster
What is High Speed Compression? High Speed Compression happens when the shock compresses very quickly. High speed compression occurs when hitting things like curbs, speed bumps, larger rocks, or washboard roads at higher speeds (although this is not exclusive to driving speeds). Even at 75 mph approaching a gradual hill is low speed compression, but if you hit a speed bump at just 15 mph, your shock must react very quickly. This is high speed compression.
When would I need to adjust High Speed Compression? If the suspension and tires are slamming through and bottoming out on hard hits you need to increase high speed compression. You should also increase it when adding weight to the vehicle or doing more aggressive offroad driving. High speed compression adjustments are more noticeable and can be the most useful adjustment on the shock.
12 Clicks of Adjustment
Ride Shocks come from the factory with both adjusters all the way decreased (open). This means they are at their softest setting. This allows you to have a full adjustment to increase the firmness of the ride. Only make adjustments by hand. Using a tool may damage adjusters.
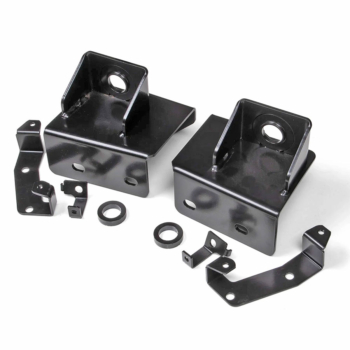
Obtaining Proper Clearance
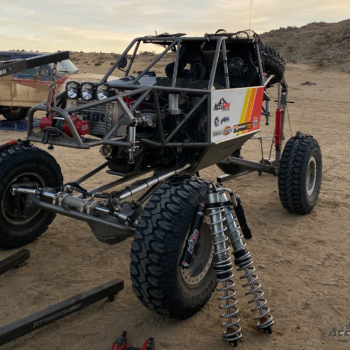
JKS builds on the capability of the new Ford Bronco with a new Max Tire Clearance Kit designed to optimize the front wheel-well to install larger tires on your stock height or lifted Bronco models. We use these on our own test vehicle and can confirm that they are absolutely the best quality and a MUST HAVE item when using larger tires.
- High clearance body mount provides a clean look with mid-width and stubby bumpers
- Allows for larger tire fitment at all ride heights – Max tire size is dependent on lift height.
- Full clearance through wheel travel at 2-4″ of lift with 37×12.50 tires (17×9 to 20×9 with 4.5-5.5″ backspacing recommended)