March 9, 2021
Bypass Shocks PART 1
- How do Bypass Shocks Work?
- Shock Zones & Basic Tube Layout
- Bottom Take Off Reservoir
- Off the Shelf Options
- Multiple Compression and Rebound Tubes
- Staggered vs Overlapping Tubes
- Piggyback vs Remote Reservoir
- Shock Diameter
- Tube Layout Around Body
- Tube Heights & Diameter
- Custom Setup Recommendations
- Fox vs King Comparison
- Check Valve Design
- Pistons
- Bypass Adjusters Screws
- Piston Rods
- Oil Seals
- Bypass Shock Setup
- Up Travel
- Motion Ratio – Coilover & Bypass
- Total Weight
- Weight Distribution (front/rear)
- Unsprung Weight
 Bypass shocks can deliver a massive performance boost for your off-road vehicle—when properly set up. With the right shock body size, stroke length, bypass tube configuration, and custom tuning, they offer exceptional control and comfort in extreme terrain. In this article series, we’ll break down how bypass shocks work, explore the pros and cons of different setups, and explain how they can be tailored to match your suspension system.


How do Bypass Shocks Work?
Bypass shocks work by channeling shock oil through external tubes that bypass the main piston. Each tube is equipped with a one-way check valve, allowing oil to flow in only one direction. By placing these tubes at different heights along the shock body, you can create zones with varying levels of damping—softer in some areas, stiffer in others. The stiffness in each zone is determined by the diameter of the bypass tubes and how far the check valves are allowed to open, which can be adjusted externally.
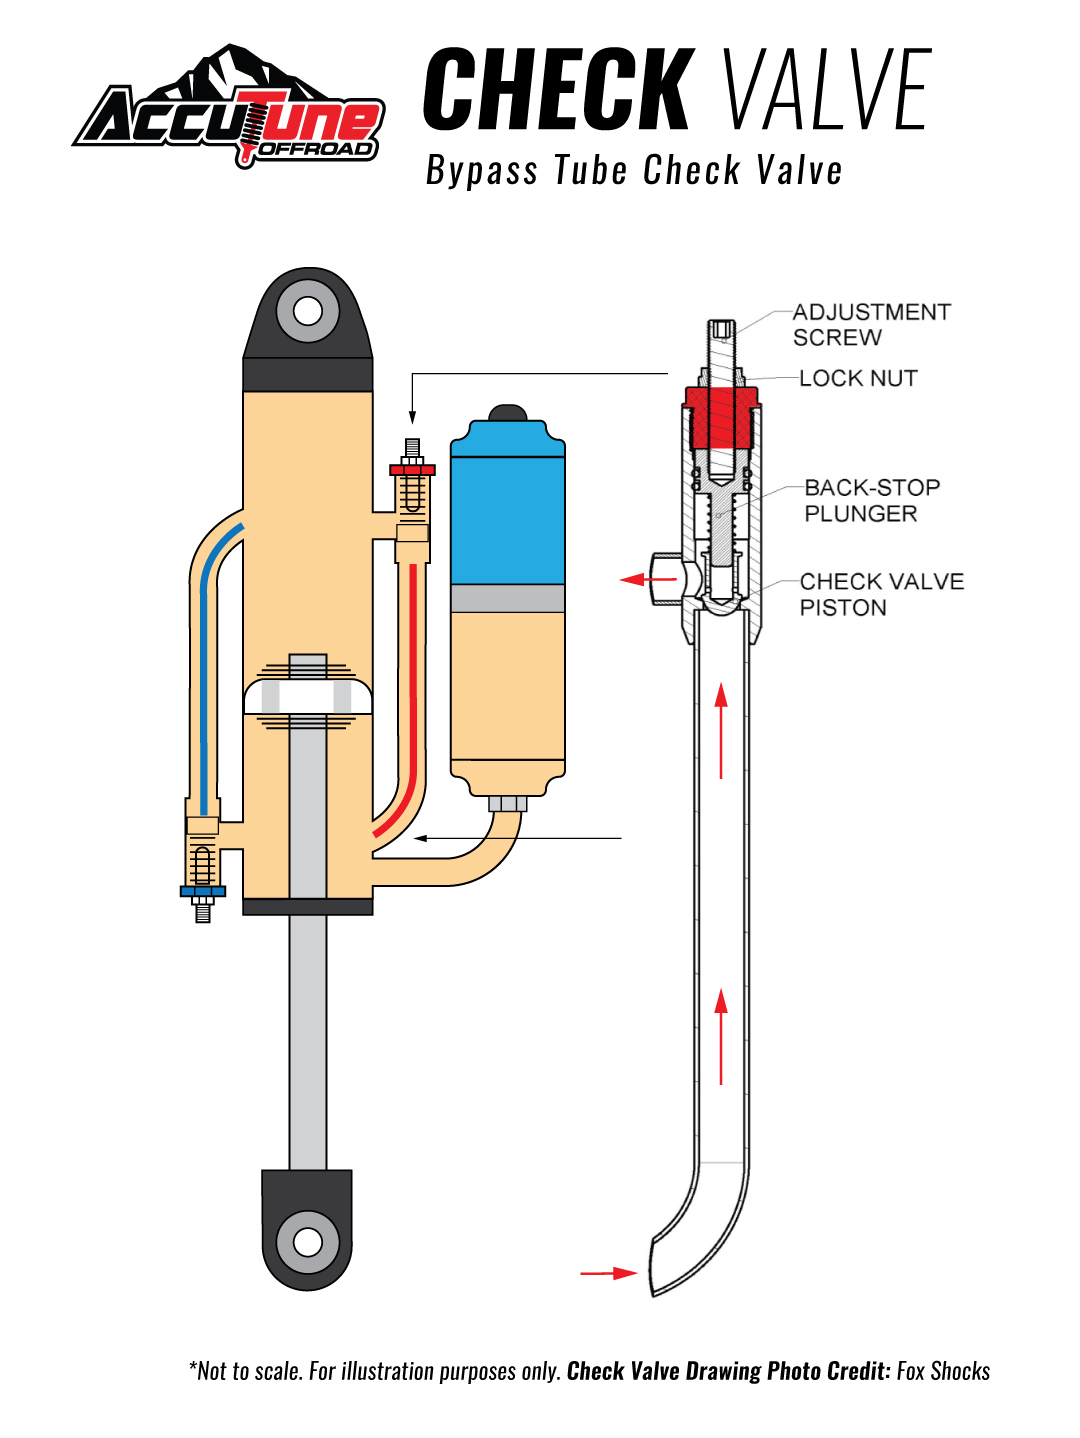 Bypass Shock Check Valves
Each bypass tube is equipped with a locknut, adjustment screw, plunger, and check valve. When oil flows through the tube, the check valve opens and moves back until it contacts the Back Stop Plunger. The adjustment screw controls how far the check valve can travel, which in turn regulates how much fluid can pass through. A greater travel distance allows more oil flow, resulting in softer damping. Once the desired setting is achieved, the locknut secures the adjustment in place to prevent movement.
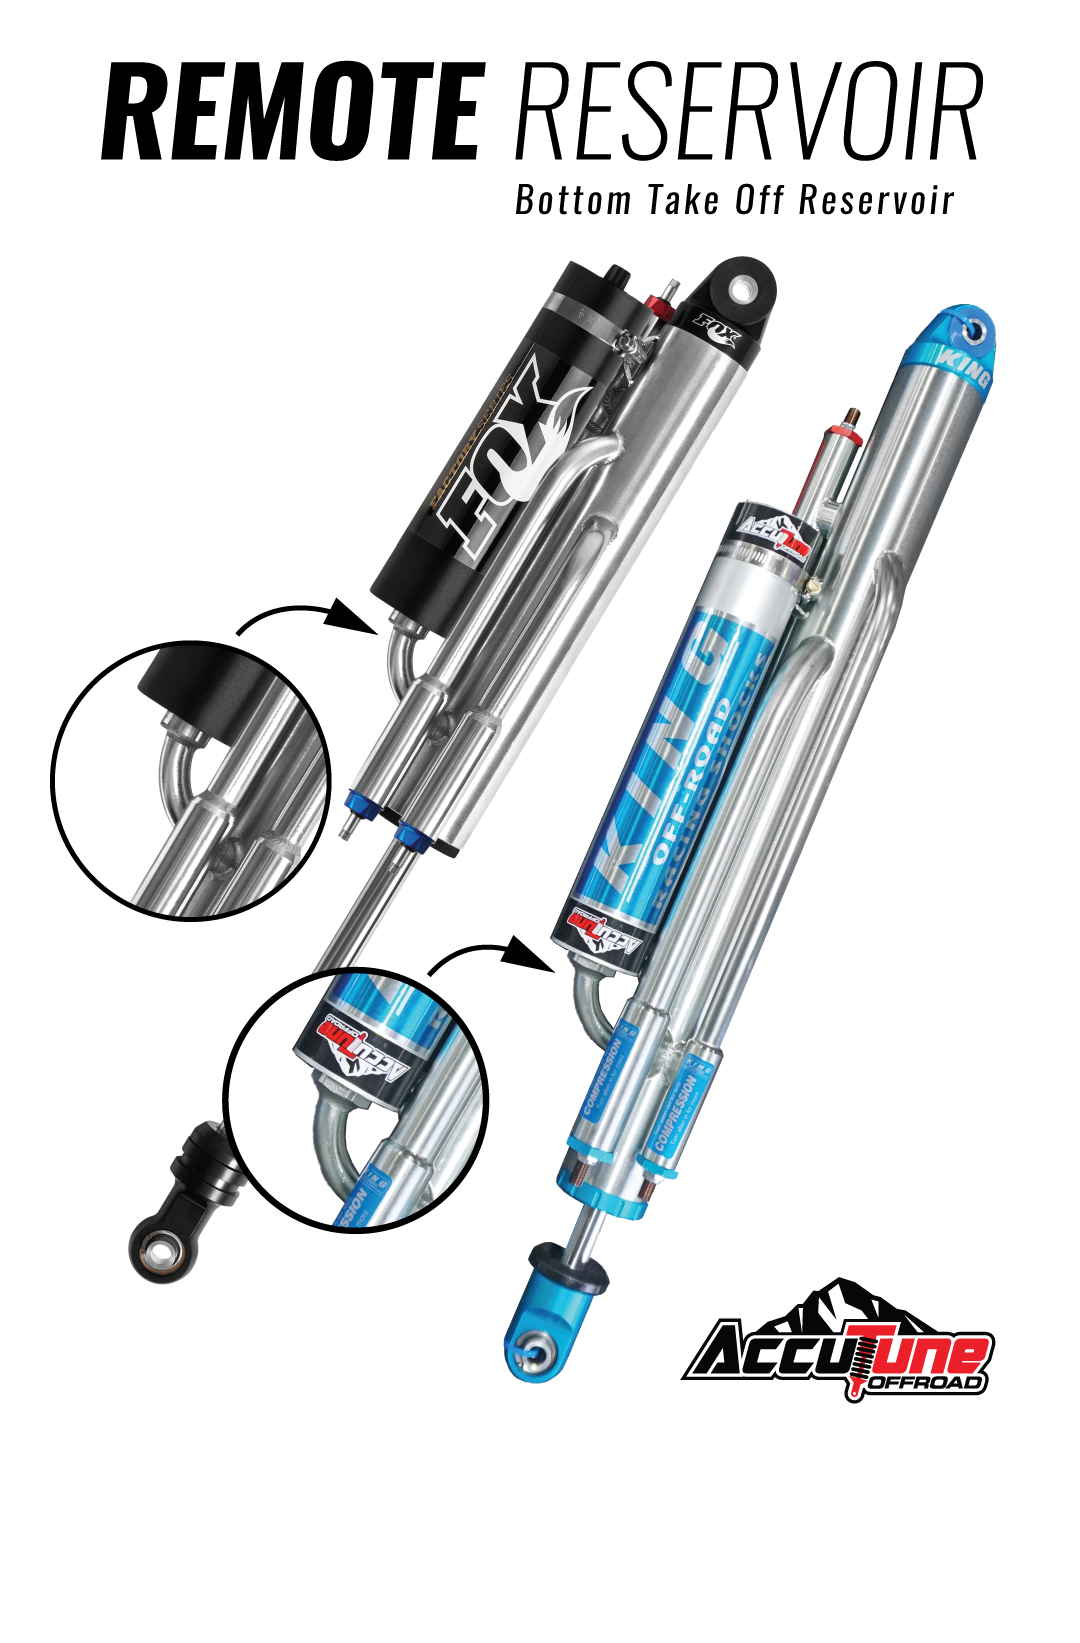 Bottom Take Off Reservoir
Most traditional shocks feature a top-mounted remote reservoir, but bypass shocks almost always use a bottom-mounted configuration—and for good reason. In a typical top take-off design, compression damping is resisted by the nitrogen charge and the flow restriction through the reservoir hose. Under certain conditions—especially at higher shaft speeds—this setup can reach a point where damping force stops increasing with velocity.
This happens because the internal floating piston (IFP) gets pushed deeper into the reservoir, compressing the nitrogen and potentially creating a vacuum beneath the main piston. When the shock transitions from compression to rebound, the piston can “slap” into the void, resulting in reduced rebound damping.
By relocating the reservoir to a bottom take-off, bypass shocks eliminate this issue, allowing for more consistent and predictable damping across the entire range of shock speeds.
 Bypass Shock Zones
Because bypass shocks are position-sensitive, proper tube placement is critical. Incorrect tube positioning can result in a shock that feels too stiff and harsh, overly soft and bouncy, or even impossible to tune effectively. The height of each bypass tube relative to the piston travel directly impacts how the shock performs.
In a standard 2-tube bypass setup, there are three primary zones that define the shock’s behavior:
-
Ride Zone: This is the middle of the travel range where your vehicle spends most of its time—typically around ride height. Oil flows through the bypass tubes here, allowing for a controlled and comfortable ride.
-
Bump Zone: This is where the shock is nearing full compression and the piston has passed all the compression bypass tubes. In this zone, oil must flow through the internal valving, resulting in maximum damping to control bottom-out forces.
-
Top-Out Zone: This is when the shock is fully extended. The piston has passed the rebound tubes, so rebound damping is entirely controlled by internal valving, helping to prevent harsh top-out.
Properly setting these zones ensures that the shock performs smoothly and predictably across its entire stroke.
Summary
A shock’s true performance comes down to its tunability—its ability to manage force across a wide range of shaft speeds. When a shock can’t flow enough oil, it forces oil through small, fixed orifices, causing damping forces to increase exponentially and resulting in a harsh ride. Bypass shocks can suffer similar issues if the internal valving is too stiff or the bypass tubes are too small.
What makes bypass shocks so powerful—their external adjustability and position-sensitive control—also makes them more complex. That’s why it’s crucial to run the right bypass shock setup for your vehicle and driving style—and to determine whether a bypass shock is even necessary in the first place.
Bypass Shock Part I FAQ:
 Do I need Bypass Shocks?
Bypass shocks operate using defined soft and stiff zones—but they need enough suspension travel to work effectively. Without sufficient up travel, there isn’t enough room for each zone to engage properly, which can lead to a ride that feels either too soft or too harsh. For this reason, bypass shocks are generally not recommended for setups with less than 5 inches of up travel.
Bypass shocks are purpose-built for off-road performance. If your primary goal is a smooth on-road ride and you don’t plan on hitting high-speed whoops or rough terrain, bypass shocks may not be the ideal choice. Their construction and tuning potential are geared toward aggressive off-road use, and as a result, they can ride rougher on pavement. If you don’t need that level of off-road capability, a more traditional shock may offer better all-around comfort and value.
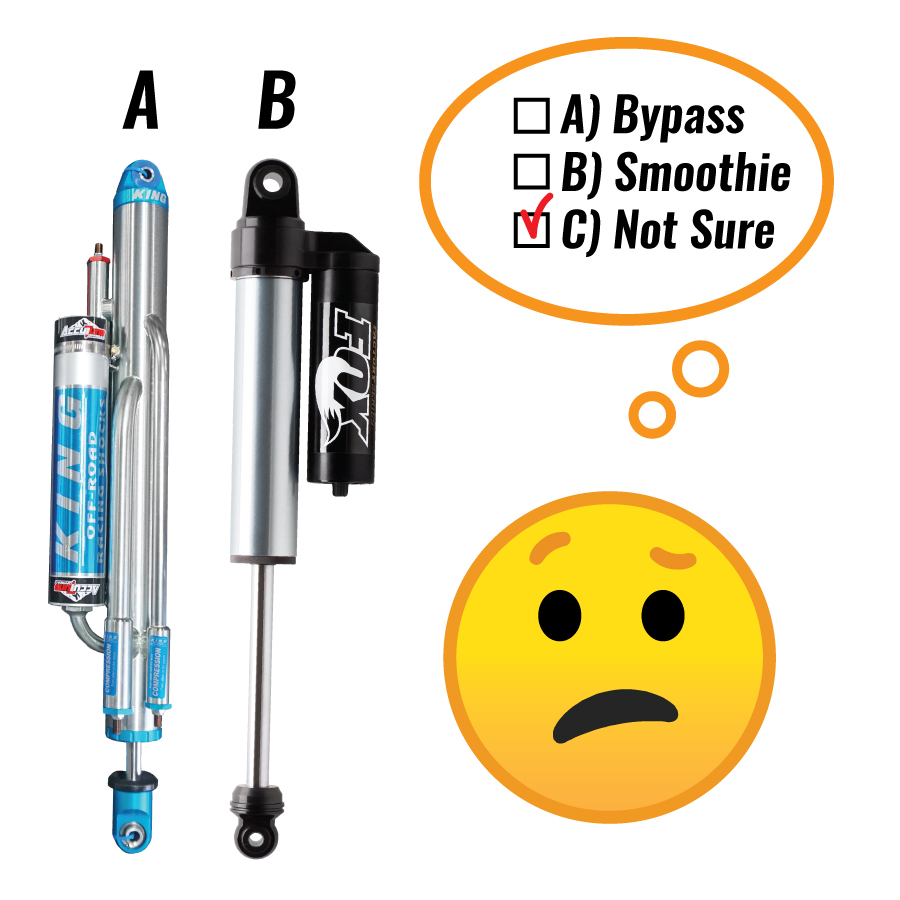 When should you consider a bypass shock vs a smoothie?
Bypass shocks are more expensive and more complex than standard smooth body shocks, and they require more effort to get right. But when you invest in high-quality bypass shocks, set them up properly, and take the time to tune them, they can deliver exceptional performance across a wide range of off-road conditions. On the flip side, poorly tuned or budget bypass shocks often perform worse—and ride harsher—than a well-tuned smoothie.
Because bypass shocks are position-sensitive, they’re not ideal for vehicles with large changes in ride height—often due to varying cargo loads or accessories. As the ride height shifts, the piston may sit in the wrong damping zone, leading to a harsh or unstable ride. For these applications, smooth body shocks with compression adjusters are typically a better and more consistent option.
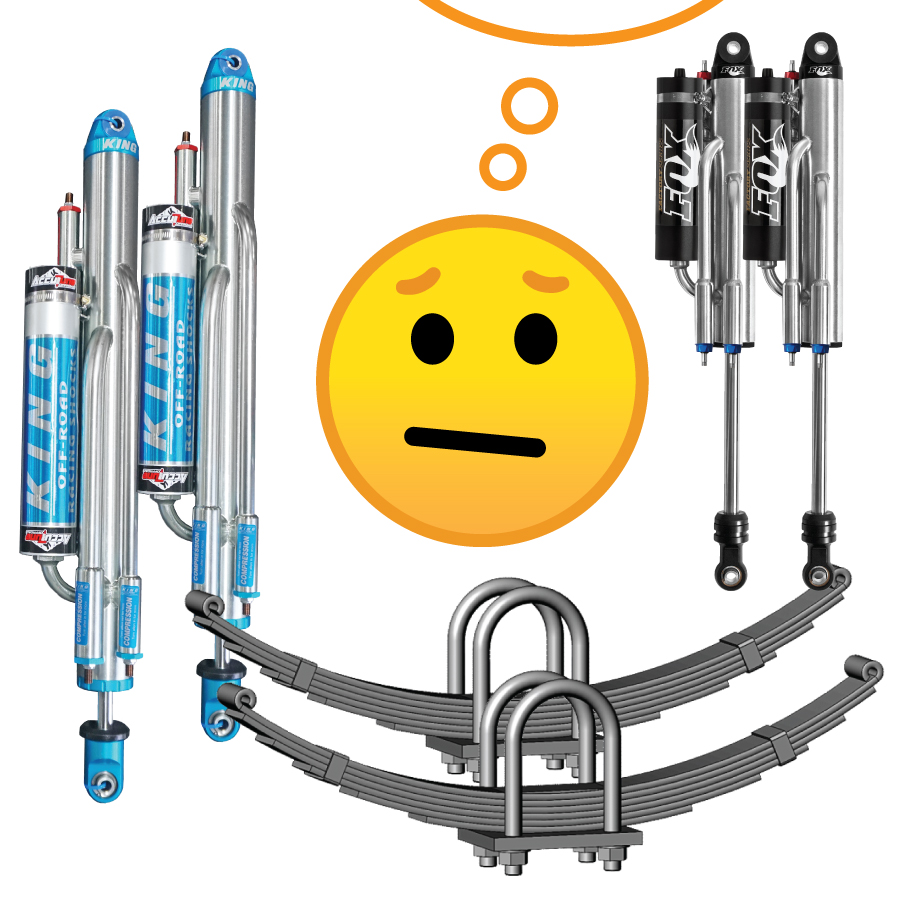 Bypass shock with leaf spring vehicle good vs bad?
Leaf springs and bypass shocks can work well together—but only with proper tuning. One of the challenges with bypass shocks is that they aren’t particularly effective at fine-tuning low-speed damping, which plays a key role in controlling bounciness and handling g-outs.
In a traditional coilover and bypass setup, the coilover handles low-speed damping, while the bypass is used primarily for high-speed control. However, with a leaf spring setup, there’s no coilover—so the bypass shock must handle both low- and high-speed damping. While this can absolutely be made to work, it typically requires significantly more time and effort to tune compared to a coilover/bypass combo.

Release Date: March 23rd
- Off the shelf options
- Multiple compression and rebound tubes
- Staggered vs overlapping tubes
- Fitment & installation