Tech Tip: Fox DSC Adjuster Knob Assemblies
May 11, 2021
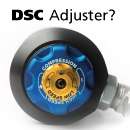
![]() Images below will show how to remove the High and Low Speed Compression Adjuster Knobs from a Fox shock. DSC Adjusters can be found on a variety of shocks and they can also be added to the shocks you already have.
Images below will show how to remove the High and Low Speed Compression Adjuster Knobs from a Fox shock. DSC Adjusters can be found on a variety of shocks and they can also be added to the shocks you already have.
*AccuTune is not responsible for anyone taking apart their DSC adjuster incorrectly, or causing damage. It’s always best to have a professional complete the work. May void manufacture warranty.
FAQ
Q: Can I loosen the top screw on my DSC Adjusters to make them rotate easier?
A: No, that will not help the knob turn easier. See article below that will help explain.
Q: Do I need to discharge the shock before removing the DSC Adjuster knobs?
A: No, you can safely remove the adjusters knobs without discharging the shock. However, if your adjuster knobs spin freely and do not seem to have a stopping point, do not remove the adjuster knobs at all. There is a good chance something is not right internally and will need to be inspected by a professional.
Q: Can I buy the new Orange and Grey DSC knobs?
A: Yes, we can sell you the new DSC knobs, or you can send them in to us for replacement. There will be an additional cost for parts and labor.

Before removing the DSC knobs, you may want to take note of where the adjusters are set, so you can put them back to your settings afterwards. Do not remove hoses or loosen any hose fittings, images below are for reference only.

Clamp reservoir with DSC facing upwards. Keep upright and secure.

Using a T-10 Torx Bit, remove screw holding Low Speed Compression knob on. *Note, there is loctite on the threads of this screw. Remember to add loctite to this screw when reassembling it.

Remove Low Speed Compression knob and screw and set aside.

As you can see, the Low Speed Compression knob has a groove and screw to keep this in place. It is common to think loosening this screw will help the adjuster spin easier, but that is not the case at all. Loosening screw could potentially make it weaker and snap off or worse, do not loosen this screw.

On the side of the High Speed Compression knob (blue) there are 3 threaded holes with set screws. Loosen all three set screws until adjuster knob is loose. Do not remove the set screws completely.

Very carefully remove the High Speed Compression knob being careful to not lose the three ball bearings or springs.

There are three small springs counter sunk into the reservoir. No need to remove them.

We are now ready to swap DSC adjuster knobs and put everything back together.

Be sure everything is clean. A light coat of grease in the spring pockets and ball bearings can certainly help the adjuster turn smoothly. Place ball bearings on top of each spring.

Make sure the three set screws line up correctly with center holes. If not lined up correctly the High Speed Adjuster knob will not be secured properly. Compress down on the adjuster knob while screwing in all three set screws.

Place o-ring around adjuster after it has been screwed into place. This o-rings job is to keep dirt and debris out of the spring pockets.

With a small dab of Loctite on the threads, tighten screw to hold Low Speed Compression knob in place. Don’t over tighten.

All done. Secure remote reservoir back onto the vehicle and enjoy!

All done. Secure remote reservoir back onto the vehicle and enjoy!
Below shows the inside portion of the Fox DSC Adjuster. The remote reservoir would need to be removed in order to get to this side. We do not recommend opening up this side of the DSC, below images are for reference only.


Related Articles:
Do I Need DSC Adjusters?

How to DSC Adjusters Work?